Curtain Wall Installation Process in India: Step-by-Step Guide
Why Understanding the Process Saves You Money
Most project delays and cost disputes happen because the developer didn't understand what they were buying. 'Why is it taking 3 weeks just for drawings?' 'Why do you need 4 weeks lead time for glass?' These questions have answers — and knowing them upfront prevents them becoming arguments later.
Stage 1: Engineering & Shop Drawings (Weeks 1–4)
Nothing gets fabricated without approved drawings:
- 1.Structural Analysis — Wind load calculations per IS 875 Part 3, anchor pull-out calculations, thermal movement analysis. This determines whether your facade survives Pune's Nor'westers.
- 2.Shop Drawings — CAD drawings showing every mullion size, transom depth, anchor position, drainage path, and glass bite. Budget 1-2 revision cycles with the architect.
- 3.Anchor Layout Drawing — Exact anchor positions relative to the structural slab. Must be approved and anchors cast before concrete is poured. Post-installed anchors are weaker and more expensive.
- 4.Mock-Up Panel — For projects above ₹50 lakh, a 2m × 3m sample bay is built and tested for water penetration, air infiltration, and structural deflection.
Stage 2: Fabrication (Weeks 3–8)
Fabrication starts in parallel with drawing approvals to save programme time:
- 1.Aluminium extrusions cut to length using CNC saws — tolerance within ±0.5mm.
- 2.Profiles drilled for anchors, drainage holes, and glass bite — in the factory, not on site.
- 3.Powder coating or PVDF painting in a controlled spray booth.
- 4.For unitized systems: panels fully assembled in factory with glass, EPDM gaskets, and hardware. Factory QC inspection on every panel before shipping.
- 5.Glass orders typically need 3-4 weeks lead time — get this order in early. Glass is the most common cause of programme delays.
Stage 3: Anchor Installation (Weeks 4–6)
Where most structural problems originate when they go wrong:
- 1.All anchor positions surveyed from the approved layout drawing. Deviation means the aluminium frame will be misaligned — and you can't fix that without removing anchors.
- 2.Post-installed anchors use chemical resin — cure time is 24 hours at Indian site temperatures. Shortcuts here cause failures.
- 3.Pull-out tests on 10% of anchors — each anchor should achieve minimum 5kN.
- 4.Total station survey verifies anchor positions within ±3mm of design.
Stage 4: Mullion & Transom Installation (Weeks 6–10)
When the facade starts to look like something:
- 1.Vertical mullions hung from anchor brackets, each spanning one floor. Stack joints at floor level allow thermal movement.
- 2.Horizontal transoms connected to mullions with EPDM thermal break pads — cutting this shortcut creates cold bridges and condensation.
- 3.Every mullion checked against running plumb and level strings. Tolerance: ±2mm plumb per floor.
- 4.Drainage channels verified — every transom must drain to the exterior.
Stage 5: Glass Installation (Weeks 8–12)
The most visible stage with the highest cost of mistakes:
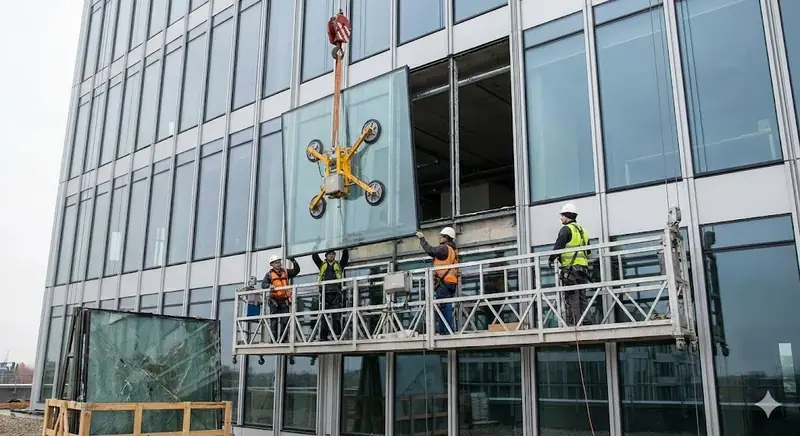
- 1.Glass panels lifted by tower crane or vacuum lifter.
- 2.Each panel set on EPDM setting blocks at quarter points — not sitting directly on the frame.
- 3.Structural silicone (Dow Corning 795 minimum) applied in controlled conditions. Silicone should not be applied in rain, below 5°C, or onto contaminated surfaces.
- 4.Every panel inspected for scratches and chips before moving to the next.
Stage 6: Sealant, Testing & Handover (Weeks 11–13)
The stage most contractors rush — and where water problems originate:
- 1.Perimeter joints between facade and building structure sealed with weatherproof silicone.
- 2.Roof parapet flashing installed.
- 3.Drainage test: flood each bay with a hose for 15 minutes minimum. Any leakage fixed before handover.
- 4.Final punch list with architect and client. As-built drawings, material certificates, and test reports handed over.
Realistic Timeline
For a medium commercial building with 3,000–8,000 sq ft of curtain wall: Engineering & approvals 3-5 weeks, Fabrication 4-6 weeks (parallel), Site installation 6-10 weeks, Sealant & handover 2-3 weeks. Total: 12-18 weeks from contract. Anyone promising under 10 weeks for a mid-size project is planning to cut quality stages. Fine Glaze provides a detailed Gantt chart with milestones at project start. Call +91 8369233566.
Explore More Facade Solutions
Browse our premium facade, glazing and aluminium cladding solutions Pan India.